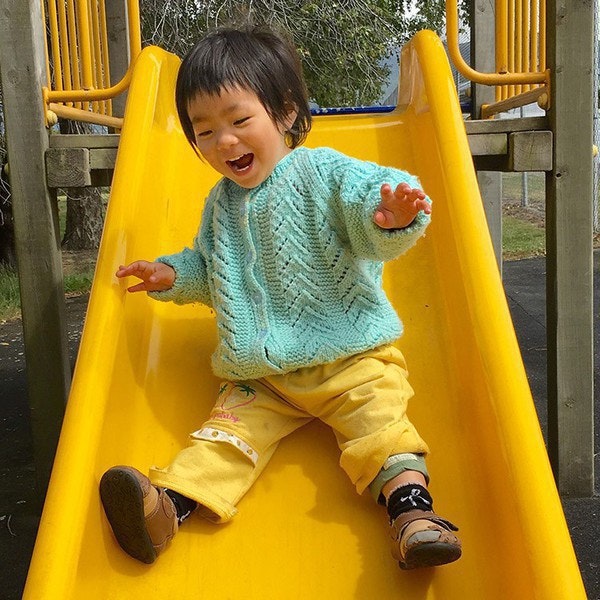
Here is a photo we took last weekend. As you can see, the light comes in from the right and casts some shadow on Mia's face. Today we will use the SnapSeed's Selective tool in SnapSeed (iOS and Android) to remove the shadow from this photo. Please click on the image to compare before and after shot.

The idea of the selective tool is that we can make changes to certain part of the photo without affecting other areas. This selection process used to be a time-consuming job that will take professional photographers hours and hours to do in Photoshop. Now you can make incredible precise selections using nothing but your own fingers.
Sounds exciting? Let's get started.
Three easy steps to brighten up the shadows
-
Create Control Points to select the areas that you want to enhance. When I touch the screen, a B shows up. This little dot is a control point. You can create as many as you like.
Once you have a control point selected, you can swipe up and down to choose different kind of modifications you can do. B for brightness, C for contrast, and S for saturation. Today we are going to use only the brightness tool.
If you want to be very precise about where the center is, long press the B icon. You will see a magnifier glass showing up. Keep pressing down and move the cross icon around until it moves to the ideal spot.
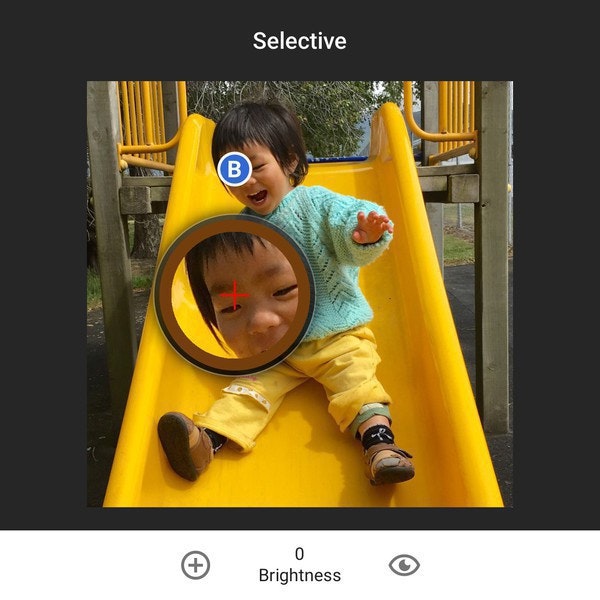
Press down and move around will turn on the magnifier glass, which gives you better visibility on where to put the Control Point. -
Control how large of a selection to create by using Size slider. To do this, you use two fingers to pinch. The circle is the area that will be affected by the change we are going to make. Increasing the reach causes the Control Point to look for similar enhancements needed farther and farther away from where the Control Point is placed.
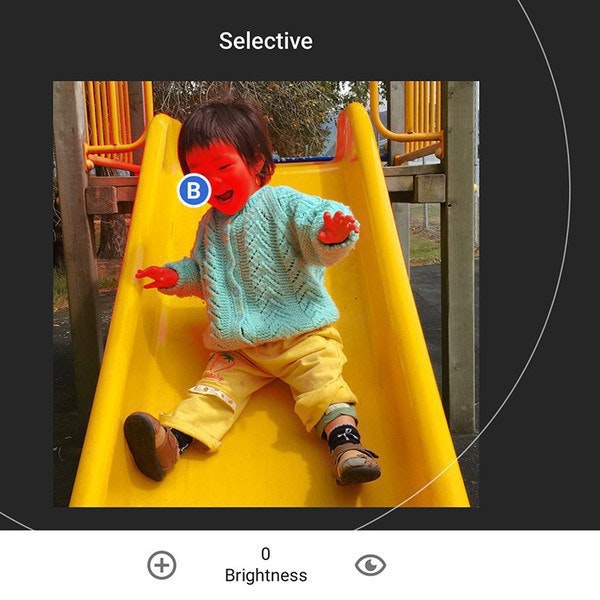
Tap the Control Point, then pinch to turn on the Size slider. The red overlay shows where the control point is affecting the image. While this is shown as a circle, the effect will only be applied to objects that are similar to the object selected by the Control Point.
If your photo has lots of details, you can create many little control points and select smaller areas for each one for finer control. For this photo though, the default is pretty good. So we’ll stay with that.
-
Swipe from left to right to make changes. As I swipe further and further, you’ll see that the face of Mia gradually lightens up. The label that shows up gives you a reading from 0 to 100, which is the strength of the effect. You can tap the icon on the top right to preview the changes.
Video instructions
More about the Control Points
The Control Point is a pretty amazing technique invented by Nik Software. It is a huge time saver but because it is so new to the market, there hasn't been a lot written about them. Here are two technical notes that you may find helpful.
- How Control Point works Each control point creates its selection based off of the color characteristics of the object that the control point is placed on. These characteristics include the red, green, blue, hue, saturation, brightness, and location of the object selected. The software then creates a selection automatically based off of the similarity of other objects and areas in the image to the selected object.
- Control points can also be reset, cut, copied, and deleted. You can also copy and paste it to different parts of the image. To bring up the menu for a control point, tap on the control point once and select Reset, Cut, Copy or Delete. To paste a control point that was already copied, tap once on an area that does not include a control point and select Paste.
This blog post is part of the free Photo Editing for Busy Parents course, where we help you make the most of your family photos. Each class covers one single topic that takes only 30 seconds to learn, even if you have no previous experiences with photo editing techniques.
<div class="chapter col-xs-12 col-sm-6">
    <a href="/blog/help-my-photo-prints-too-dark.html">
        <small class="chapter-number">Lesson 1</small>
        How to Brighten Up Your Photos
    </a>
</div>

<div class="chapter col-xs-12 col-sm-6">
    <a href="/blog/how-to-remove-shadows-from-face.html">
        <small class="chapter-number">Lesson 2</small>
        How to Remove Shadows from Faces
    </a>
</div>

<div class="chapter col-xs-12 col-sm-6">
    <a href="/blog/soften-high-contrast-statue-using-snapseed-ambiance.html">
        <small class="chapter-number">Lesson 3</small>
        How to Soften High Contrast Photos
    </a>
</div>
<div class="chapter col-xs-12 col-sm-6">
    <a href="/blog/how-to-use-snapseed-hdr-scape-to-enhance-your-landscape-photo.html">
        <small class="chapter-number">Lesson 4</small>
        How to Enhance Your Landscape Photos
    </a>
</div>
