From time to time we get questions about creating a collage for printing - particularly for our wall dots. So here are some tips on one way to create collages on your phone/tablet using the MOLDIV App. MOLDIV is a free app that is available for Android or Apple devices. The free version has a limited, but useful, set of features and then for the extra things like more filters, stickers, etc you can use the in-app purchasing.
Before getting started, let's get the free app: : www.jellybus.com/moldiv .
Step 1: select a collage layout
- Open the app
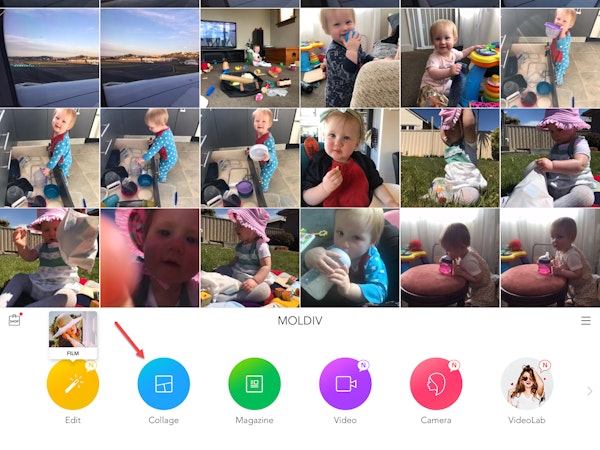
Moldiv App opening screen - Choose the Collage option at the bottom of the screen
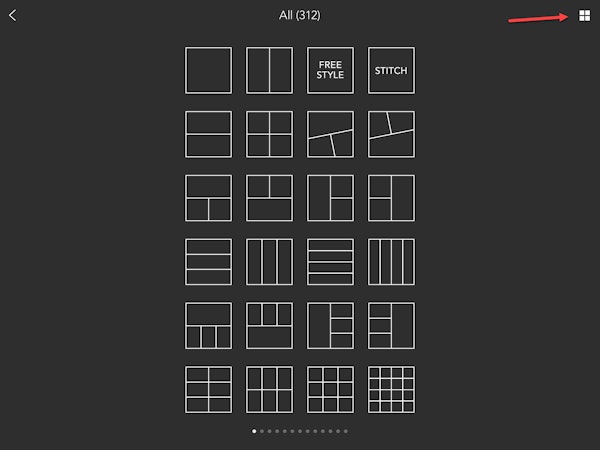
- This shows you all the possible layouts for your collage. They use a square layout by default (which is great for wall dots) but you can change this later if needed. (Please see FAQ > How can I get more layout options
- Select the collage layout you prefer and your frame will be set.
Step 2: select and upload photos
- Load your photos into the frame by touching the TAP HERE icon
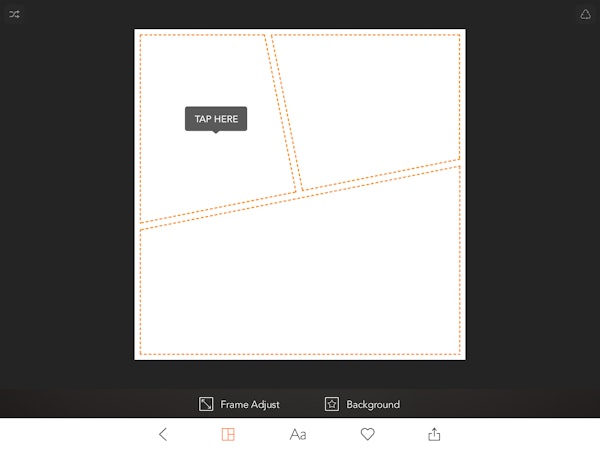
Tap here to load your photos - Choose from album (photos on your device), or camera (take a new photo to use). Here I've chosen Album, and now I can choose my specific photos. At the bottom of the screen it shows where the photos are going to be placed - don't worry about this right now as you can move them later.
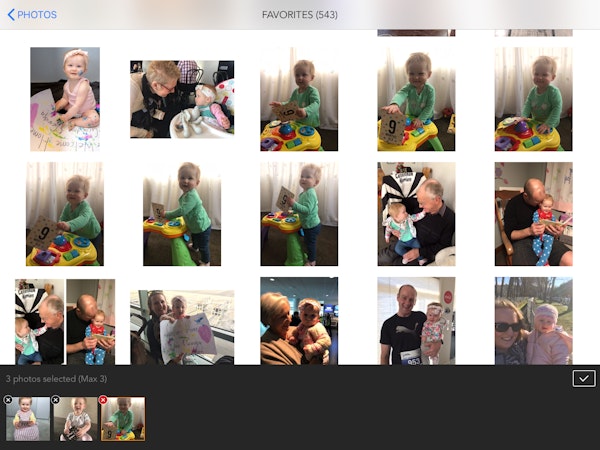
Choose your photos - Select your photos. If you pick more than the frame allows, the last photo will just be replaced.
- Touch the tick icon to finish making your selection
- The photos will be displayed in the frame.
- Adjust the parts of the frame: Touch Frame Adjust and move the orange dots to adjust the placement of the dividing lines. From the screen you can also adjust the ratio of the image as well if needed. Touch anywhere on the screen outside of your collage to apply the frame adjustments.
- To show particular layout options, for example just the ones using 1-4 photos, use the button at top right of screen and choose the option you would like.
Show 1-4 photo collage layouts - Here I've chosen the 1-4 photo options, and you can see there are 5 pages of options (swipe to see the various pages).
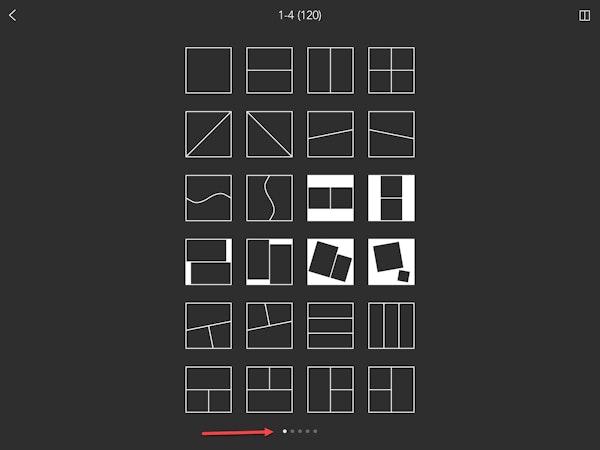
Swipe to see more layouts - Move the photos within the frame: touch and drag a photo to move it
- Zoom photo in/out: use the two finger pinch motion to zoom in/out
- Switch photo positions around in the frame: Touch a photo and select SWITCH, and the touch on the photo you want to switch with
- Rotate photo: Touch a photo and select ROTATE. Drag your finger along the ruler left/right to change the rotation angle. At the same time you can pinch to zoom the photo in/out and also drag it to re-position it. Touch any of the options along the bottom for some preset rotation options. When you are happy with the changes, touch the tick icon to apply them. To discard any changes, touch the cross in bottom left corner.
- Change the layout: touch the arrow to go back and choose a different layout
Step 3: export image for happymoose
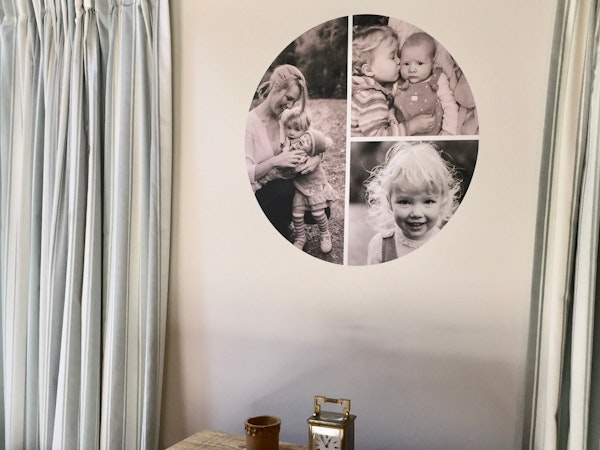
When you are happy with what you have created, touch the share icon to save your collage. I always choose the MAXIMUM file size to ensure the best quality image is saved and should be suitable for dots up to 60x60cm.
The photo collage is then saved to your device and you can upload it in the HappyMoose website to create your new walldot.

NOTE: You may find that you have to adjust the cropping in the HappyMoose editor slightly to get the image to sit exactly how you want it within the wall dot frame.
FAQ - How can I get more layout options?
FAQ - Can I add filters or rotate the photo?
Yes. Here are a few basic things you can do.

